
I’ve tried a ton of ebikes this year. I’ve modified many of them so I could ride longer and go faster. Let me tell you, with 2 batteries on the Kepler, it’s a wonderful experience! Imagine… you can travel far and wide! Go places you’d never thought you’d be able to go to before, on your Kepler. It’s basically a moped, on a bike frame.
With having the joy of being able to be out and about for hours, being one with nature, I am gracefully presenting you with a video on how to double the range of your Kepler, the amazing machine that it is. Yes! DOUBLE THE RANGE! (Range test video soon).
First, if you’re on the fence about purchasing the Kepler. Don’t be. This is a quality bike with a ton to offer. Use my affiliate link to buy yours and this will directly help support my blog, YouTube channel, and my ever growing online content. Go check out my first Kepler video. It’s a great introduction to what this electric bike has to offer.
Today, we are going to go through, step-by-step, on how to install a second battery on the Kepler. Now, I spent a lot of time researching and coming up with the best solution, for me. That doesn’t mean you have to do this modification exactly to the T that I have, but this is a great setup. Maybe change bags. Use an Ariel Rider Kepler basket on the back (or another brand if you have a preference). This modification is to be done with your OWN ideas in mind. I want you to increase the fun! Of course, it’s okay to steal my plan and do the exact same setup. Please just give me credit though and send your friends to my video and/or blog!
I want to spend more time on this bike. That’s why I did this mod. That should constitute how GOOD – THIS – BIKE – IS!
Disclaimer: This modification will void your warranty with Ariel Rider. Of course, you can confirm this with them first, but I’ve seen this mentioned in the Facebook Group several times. Also, I am not responsible for any damage you cause to your bike. I have made these modifications several times, so I am familiar with the process. If this is your first time doing this, get help from someone you know. My video will give you more thorough instructions though, so if you feel comfortable doing this upgrade, have at it. Just remember, working with Lithium Ion batteries is dangerous, if you don’t know what you are doing.
Creating a second battery box
First, this modification does not have to be performed on just the Kepler. This will work with many ebikes, as long as you have an XT-60 connection(s), or know how to adapt/change the connections at your controller/stock battery. Also, you might want to start out by removing your Kepler’s battery before we even attempt any of this. That will reduce any risk of shock.
This install took me several days, but I was also filming every step of the way. So, you should be able to tackle this in a day or two. Just get all of your materials together first, and have a game plan.
Materials list
- You will need 2 to 3 XT-60 Extension cables.
2 of these need to be at least 3 feet long to reach from the controller and factory battery, to the battery blender. This could vary, it just depends on where you are locating your blender and where you’re locating your battery.
If you do the same setup like mine, you’ll need 2 – 4 ft XT-60 connections. There are 1.5 meter long cables premade on Amazon, but you’ll need something to protect them.
Here is some shrink wrap you can use, or you’re welcome to use wire loom.
The third one can be whatever size. It just needs to reach from the second battery to the battery blender.
On mine, the XT-60 connection on the battery, was long enough to reach where I mounted the blender. - You will need a battery and a battery blender.
Battery
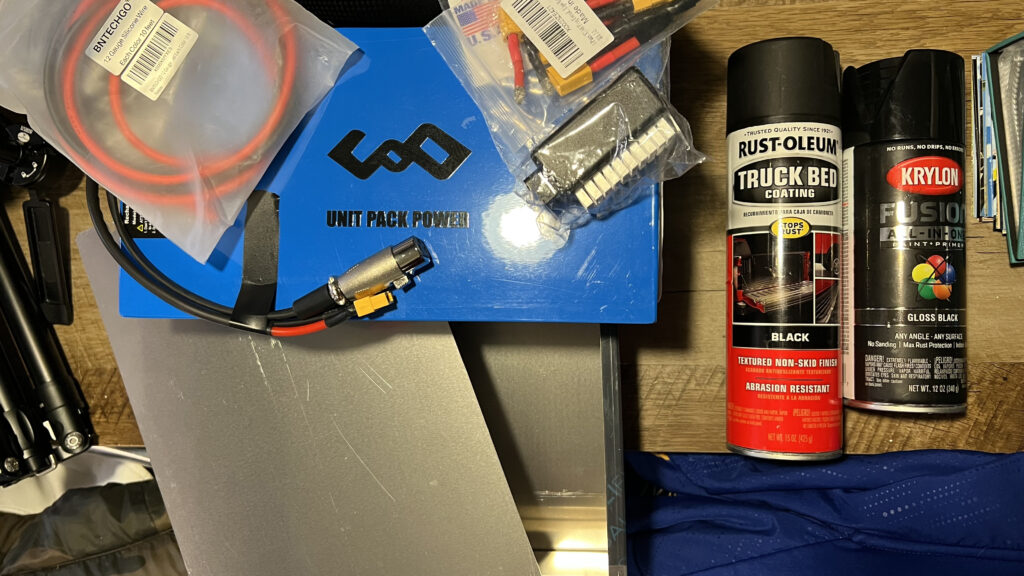
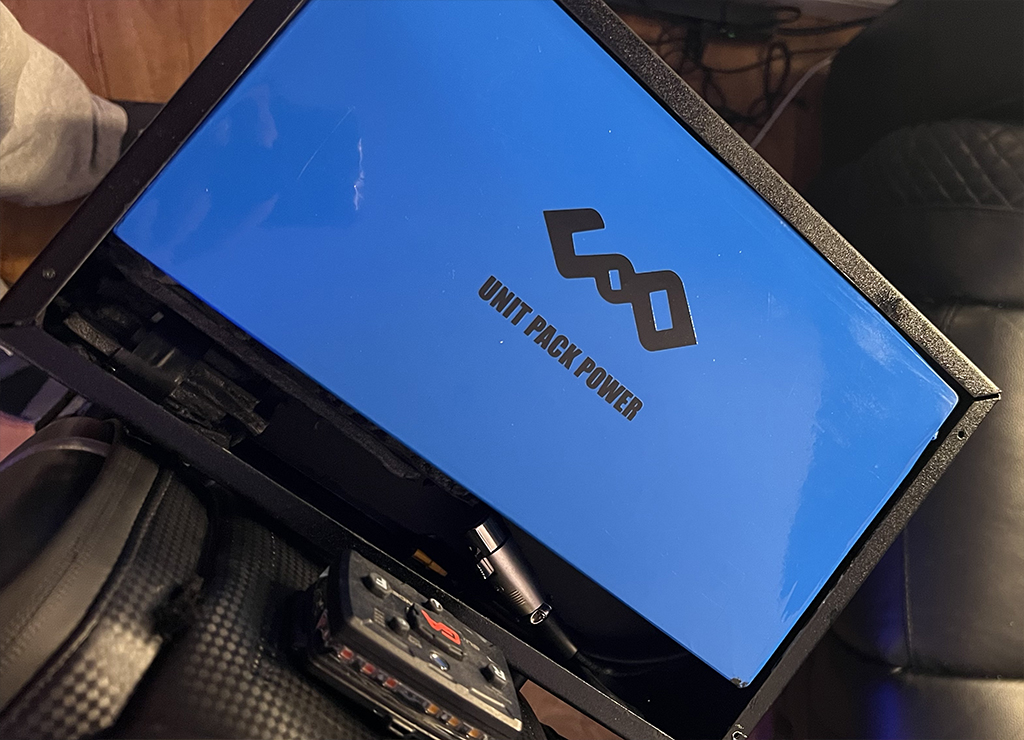
You will need a 52V battery at whatever capacity you can afford and that will fit. I got a 20Ah brick (blue in color).
Battery Blender
I used the Fusion Battery Combiner in this build. They are not always in stock though.
There are also these choices:
DATEx2
Spark Cycleworks Battery Blender - Zip ties
- If you are making your own cables, you’ll need shrink wrap, crimp connectors, and a crimper, or the pre-soldier connections that you heat up with a hair dryer. You can also soldier, but I know not everyone knows how to do this. This is the wire and XT-60 cable ends I used to make my own, along with the shrink wrap already mentioned.
- Battery Box
⤏ Box
⤏ Lid
⤏ Screws - 1 1/2” hole saw
- 4 – Rubber Washers (you can get these at Lowes or Home Depot in the hardware section)
- 4 – Regular Washers (you can get these at Lowes or Home Depot in the hardware section)
- 1 – Rubber Grommet
- A drill
- A Sharpie
- Foam Board – I got mine from Walmart
- This is the spray paint I used for the box. I would recommend applying more than one coat of paint, so it’s evenly coated. With that said, get 2 cans. I would also suggest using some primer to keep the paint adhered.
- The bag I have on the back of my bike also holds this battery, so you could realistically just use that.


Installation
- You’ll need to use the hole saw and cut a hole in the battery box for a pass way for the cables. I would also consider adding some holes for ventilation as well, but the one hole may be enough to keep the battery cool.
- Next, mark the placement for where you’ll be drilling the 4 holes to attach the box to the rear rack.
a. To do this, first measure the width of the rear rack.
b. Then, measure the width of the box.
c. Find the middle of the box (1/2 of your measurement) and find the middle of the rack.
d. Take a piece of masking tape and place it on top of the rack, over the mounting holes.
e. Cut the masking tape to the width of the rack.
f. Measure and find the middle and mark a line on the tape.
g. With the masking tape stuck over the holes, mark the placement of the holes on the rack.
h. Take that masking tape and set it to the side.
i. Next, take your battery box and place it on the rack, in the relative spot that you think you’ll want to mount it. Try to get it as centered as possible and find the best placement for the holes to be drilled
j. Underneath the rack, use a sharpie and draw lines across the bottom of the box. Draw a horizontal line on each side of the rack bars (where the mounting holes are).
k. Now, draw a center mark in the middle of each of those markings.
l. Take your masking tap, put it in the middle of those bars, and mark the holes for your box.
m. Drill out the holes a little bigger than the rack for easy adjustment. - After everything is cut and drilled, we begin painting the battery box and lid.
I painted mine with THIS bedliner spray paint I applied a coat every 20 mins for a total of 5 coats of paint on everything. You’ll need two cans of spray paint. - Once the paint has dried, attach the grommet.
- The bolts I used to secure the box to the rack are M5 allen bolts. I also picked up a few washers from Lowes (or get them at Home Depot).
- I applied blue Loctite to each bolt, so they would not rattle loose. If I decide to keep everything as is, I will reapply red. Blue is temporary, red is permanent.
- Once the box is bolted down, apply foam to the top and bottom, and sides once the cables are ran. I used foamboard from Walmart and a thin piece of cardboard on the top.
- Next, remove the stock battery from the housing.
Remove the housing from the battery compartment, where the connection points are for the stock battery. There are two screws, marked below (I already removed one of them in this photo).
This is where the battery housing connects to the controller. We are essentially breaking this connection, and forming a male and female XT-60 connections at the bottom of the bike. Luckily there are 2 – XT-60 connections in this location added from the factory, which makes this whole process that much easier! I bet Ariel Rider knew I was going to make this video! 😂🤣 - Next, pull the XT-60 connection apart from the underneath of the bike, and fish that cable through the port, releasing the housing. You’ll have to pull pretty hard here, but try not to rip the cable out from the housing. Help it through it’s hole. You may have to wiggle and pull to get it out.
- Then you will need to fish a second XT-60 out from the port. This XT-60 is the connection to the controller. It is hiding in the hole, so you’ll have to kind of search for it (get a flash light). We are going to push that through the grommet and out the bottom of the bike. This was relatively difficult. I found removing the grommet from the bottom of the bike, where the cables go through, helped get the second XT-60 out. You’ll just need to push it through. Take your time and be patient, cause you don’t want to rip the XT-60 connector off in anyway.
- Now you can reattach your housing to the bike frame, and at the same time, fish the second cable through the bottom hole in the frame. We want both XT-60s dangling at the bottom of the frame after this step, like the following:
- Run the cables from the stock battery to the box. Run another cable from the controller to the box. This is where you’ll use the 1.5 meter cables.
- Next, we’ll attach the blender on the bike somewhere. This is personal preference. I mounted my blender on the bottom of the battery box with some Gorilla tape (similar to 3M). It’s a strong adhesive which is holding up well.
- Run your power cable from your second battery to the blender, through the porthole on the box that we drilled earlier. Remember to add your grommet if you didn’t already do that step. This is where we will begin placing the battery into the box.
My battery cable was long enough to reach the blender, so I only needed to use the 2 XT-60 extension cables.
Shove all excess cable, through the porthole on the battery box. There should be room in the front to hold those. - Add foam around the battery. I put several layers to hold the battery in place. I also made a block of foam out of the extra foam board, to hold the front of the battery in place, so it didn’t move at all.
Note: Leave space for the excess cable from your extensions. - Connect everything to the blender.
- Test to make sure you’re getting power.
You can unplug the factory battery from the blender, and just keep the new second battery and controller connected, the bike should power on.
Power it off and do the same thing with the stock battery and controller. If the bike powers on both times, your wiring is complete. - Once everything is ready, screw the top plate on your battery box.
- Next, charge both batteries to full, so that they are balanced.
I almost forgot to mention…
The UPP Battery comes with a big 4A charger.
There is a chance you may get a 3A charger in yours. It depends on the stock amount.
If you get this one, make sure your switch is set to 115V and not 250V. Mine came set as the wrong voltage. - You’re all done! Time for double the range and so many more (s)miles!


